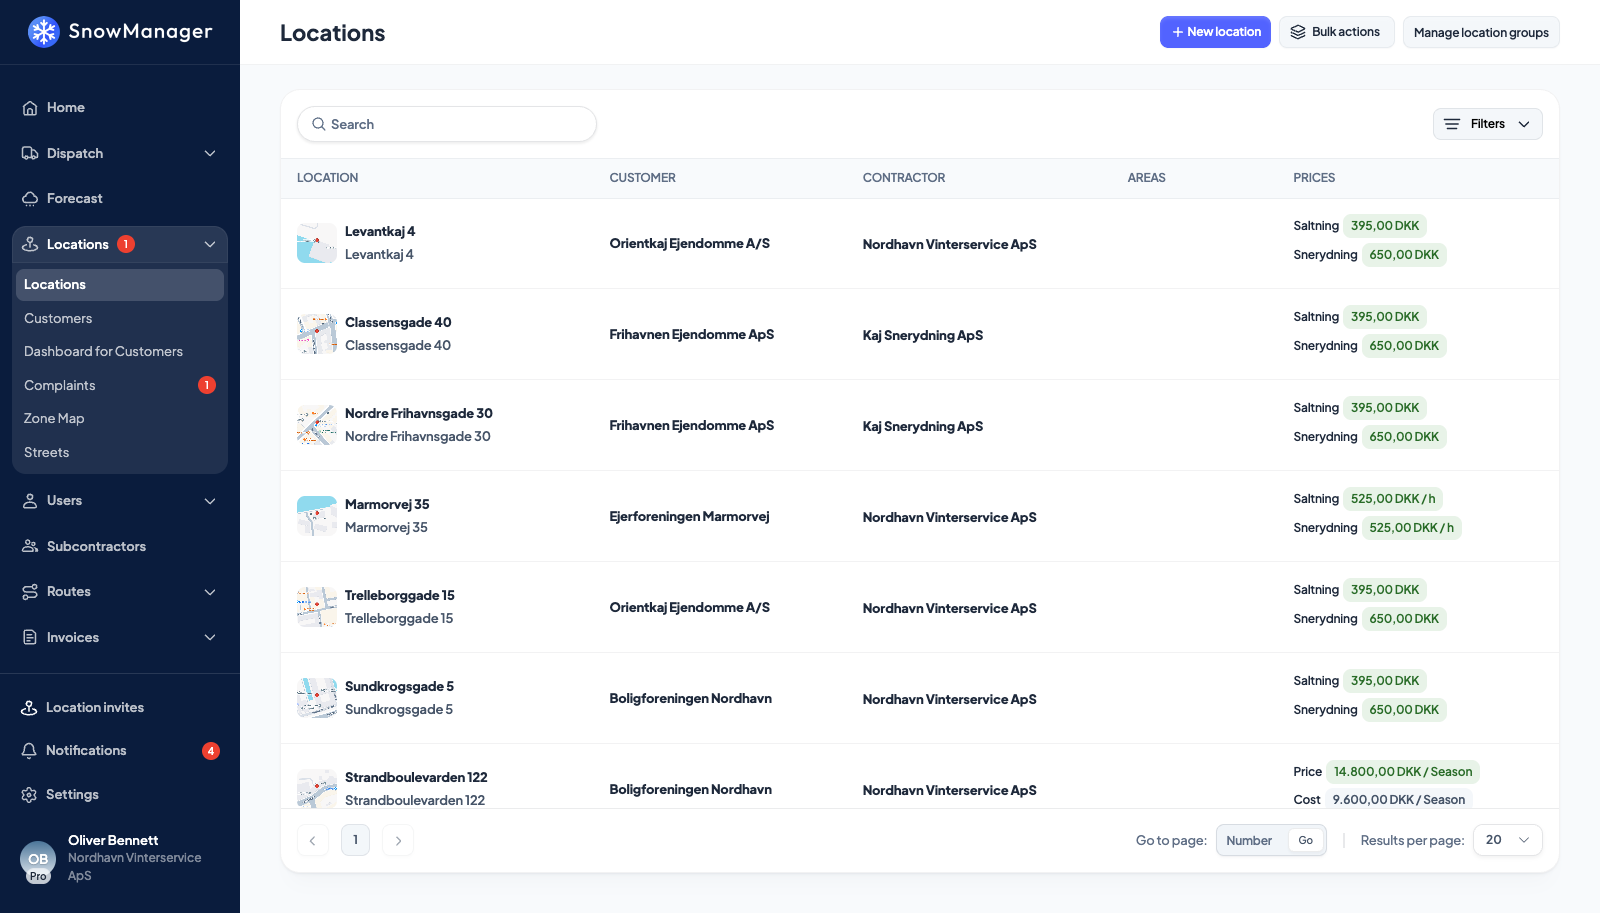
Addresses (Locations in the menu) are what everything else hangs on: routes are lists of them, zones contain them, dispatches send drivers to them, and invoices are built from the work done at them. Each address belongs to exactly one customer.
Create one
-
Open Locations in the left menu and press New location.
-
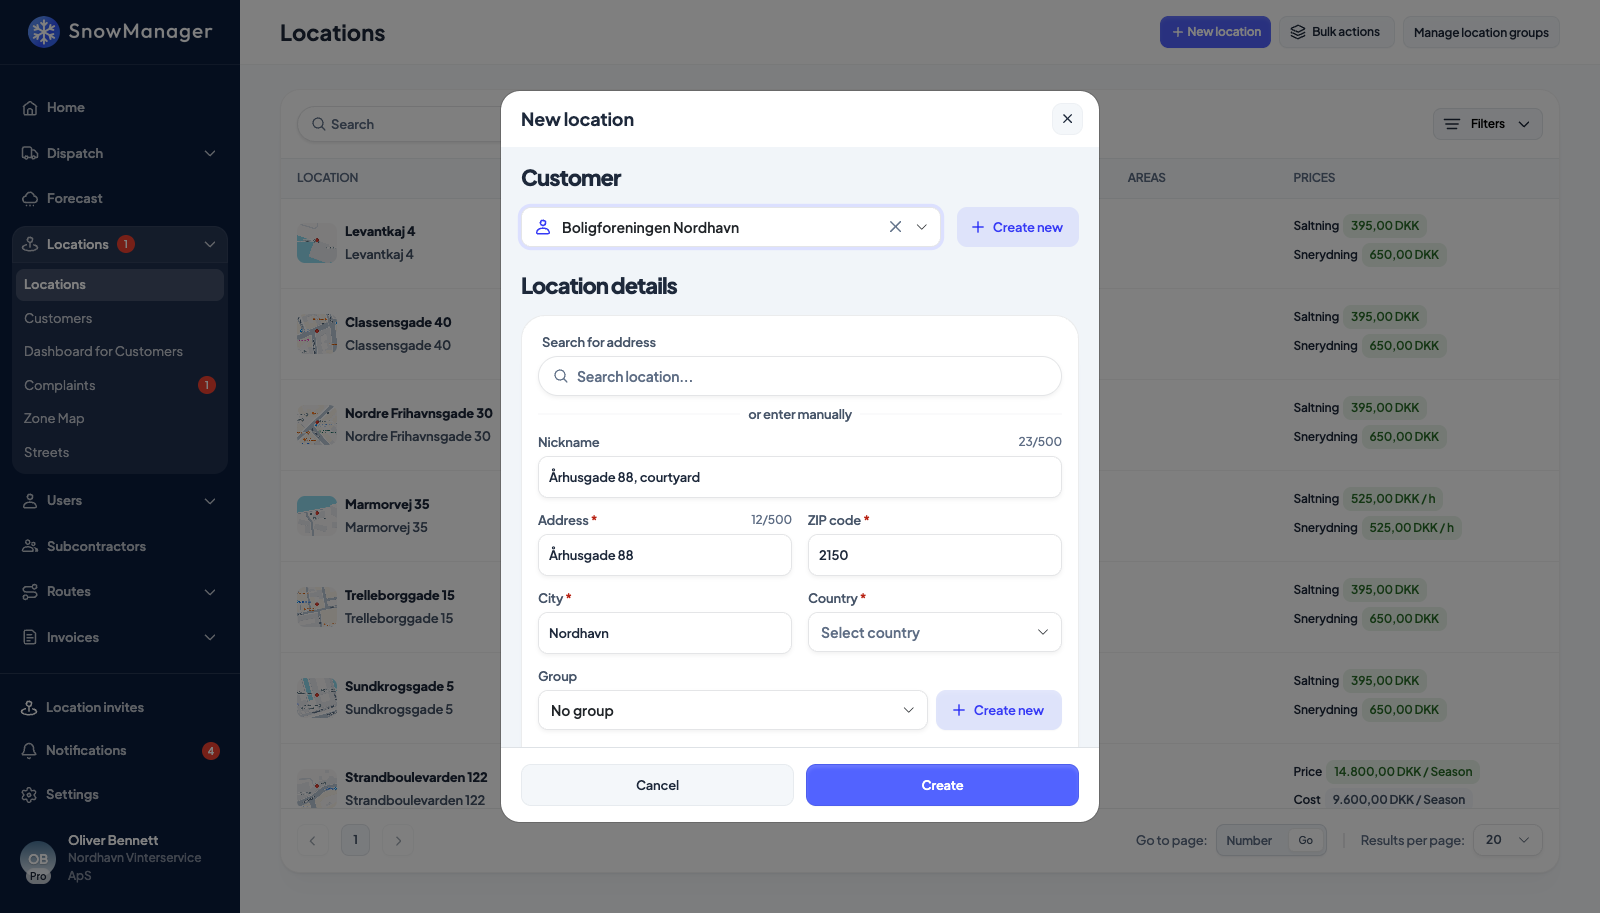
Under Customer, pick an existing customer or Create new one on the spot.
-
Under Address, type into Search for address and pick the match: the address is geocoded, which is what puts its pin on the map and lets the GPS recognise a driver's arrival. If the search cannot find it, press or enter manually.
-
Fill in what you know:
- Property ID: your own reference for the account the property belongs to. It takes letters as well as digits, it is shown in front of the name throughout the app, and several addresses may share one.
- Nickname: a short name drivers will recognise.
- Keycode and Completion time (minutes): for the drivers.
- Description: a public description, visible to the assigned subcontractor. Internal: a private description only your own business sees.
- Invoice reference, Economy ID, Profit ID: references that travel onto the invoice and into your accounting system.
- Group: a location group, if you organise addresses that way.
- More fields folds out two more: Standard price regulation (%), the address's own regulation percentage, and Price regulation every year on, a day and a month (pick both; 29 February is allowed and counts as 28 February in other years). Both are optional and are read by Price regulation on the list, see Raise prices by a percentage.
-
Press Create.
If Auto assign new locations to yourself is on in Settings, the address is assigned to your own business at once; otherwise it shows Missing business in the list until you assign it or hand it to a subcontractor. An address can be saved without a pricing type (the price is often not agreed when the address is taken on) and shows Missing prices until it has one.
Then, on the address
Click the address in the list to open it. The details have tabs for Details, Prices, Contacts, Routes, Dispatches, Complaints and Changelog.
- Contacts: the customer's people at this address. They automatically receive the location's progress emails. An email or phone may appear only once per address.
- Dispatches: every run that has been to this address, with what happened at this stop. The icons on a row say that an office user settled it instead of a driver checking out, that a note was written on it (hover to read it) and that photos were taken. Click the row to open the stop itself, with its times, its visit timeline and a link on to the whole dispatch.
- Notifications: additional emails that receive location updates aside from the customer.
- Location drawings: the areas to clear, drawn on the map per work type; these drawings are also what the GPS uses to recognise the address.
- Rules: service rules that change the price or keep the address out of dispatches on certain days, hours or holidays.
- Photo required: a driver cannot complete the stop without a photo. The stop panel on the web shows the requirement as a bar, amber until a photo exists, and an office user may complete the stop without one; the dispatch changelog records that they did.
- Upload files: contracts, site notes, anything the address comes with. Each file carries its own two switches, one for the customer and one for the drivers, see Hide a file from drivers.
- Hidden from customer / Shared with customer and Share end time with customer: what the customer portal shows for this address.
- Opening time, under More fields on the Details tab: the time of day the address opens. Fill it in where you know it; clear the field to remove it.
- Make inactive / Make active: takes the address out of dispatching, now or from a date.
- Delete location: for an address created by mistake. It is greyed out once the address has been on any dispatch, cancelled ones included; such an address is made inactive instead. See Make an address inactive.
Every change to an address is written to its Changelog, with who changed what and when, starting with its creation: the first line reads created the location with the name (or the address, when it has no name). The category filter at the top of the tab starts afresh for each address you open.
Many at once
Import on the list takes a spreadsheet of addresses (with contacts, emails, groups and per-work-type prices) and shows a dry run of what each row will create or update before anything is written. Export gives you the same sheet back. See Import addresses and Export addresses.