The list on Locations shows 20 addresses a page; Results per page at the bottom changes that to 10, 30, 50 or 100, and the arrows beside it page through the rest. Once the list runs to hundreds of addresses, paging is the slow way to find one: use the search box, the filter popover and groups instead.
Search
Type in Search and press Enter (or click elsewhere). It matches the name, property ID, street, postcode, city and country, and the customer the address belongs to, by name or, on addresses you own, by customer number. Spaces before and after the text are ignored. Clear it with the cross in the box.
Filters
Press Filters to open Filter locations.
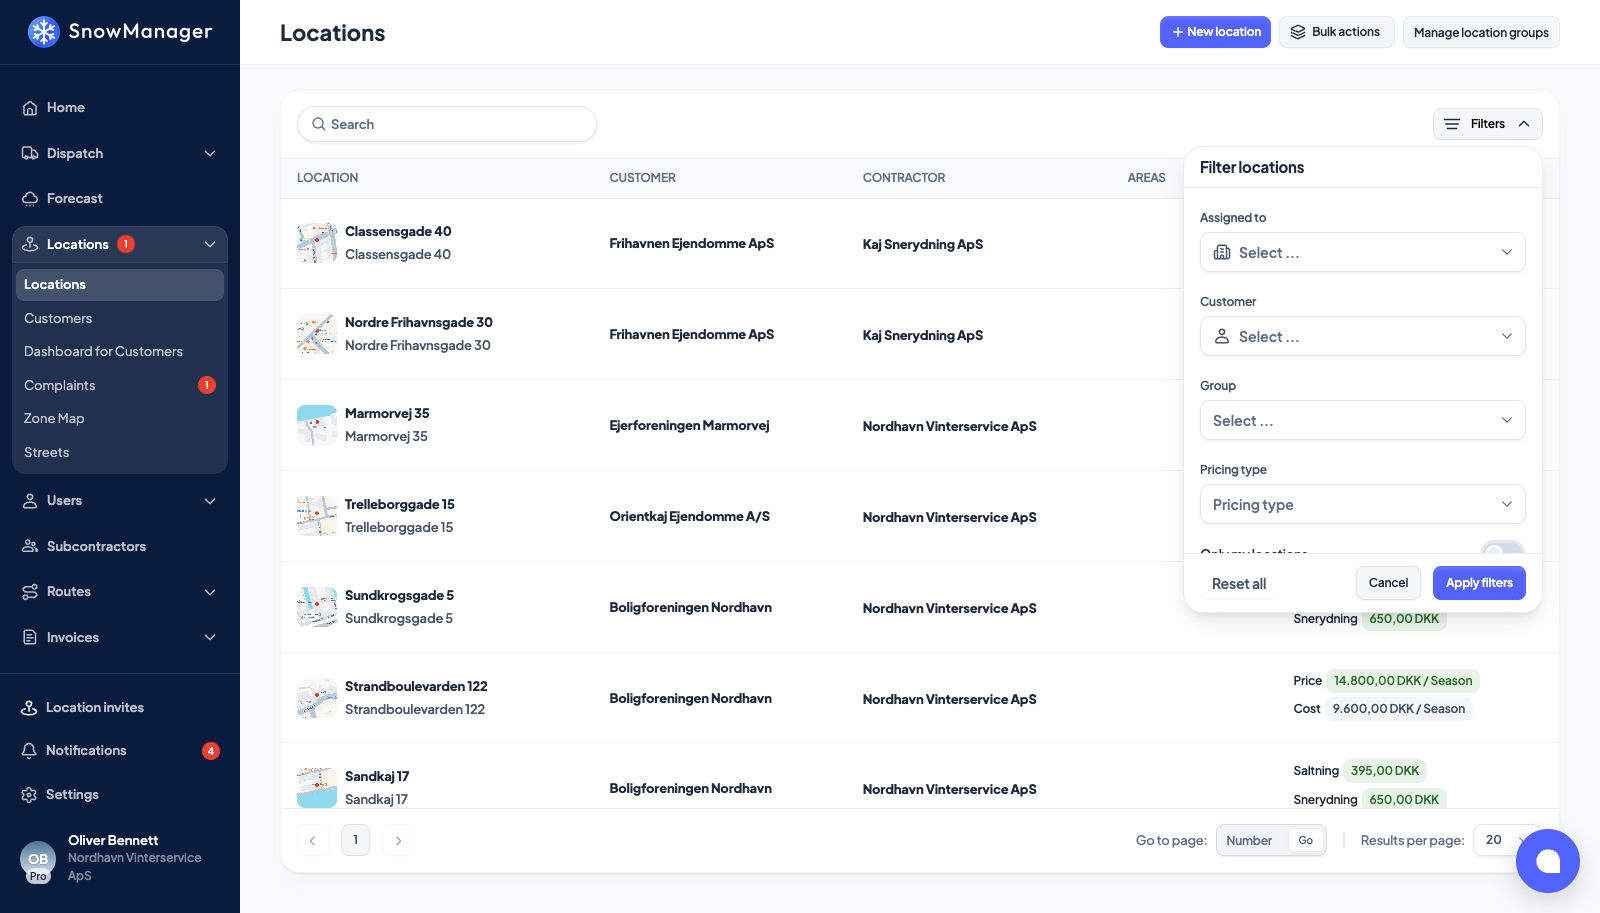
- Assigned to: addresses one of your subcontractors holds.
- From: where an address came from. Own addresses keeps the ones you own; picking a company keeps the ones that company handed to you. The filter only appears once somebody has handed you an address, so on a list you own outright there is nothing there to ask.
- Customer: one customer's addresses.
- Group: one of your location groups, or No group for addresses in none.
- Pricing type: any mix of Per task, Per season, Hourly and No price. No price also finds addresses where no pricing type was ever chosen, the ones the list marks Missing prices.
- Only my locations: addresses you own, leaving out those handed to you.
- Status: Active, Inactive or All. The list opens on Active, so an address outside its active window is out of the way until you ask for it (see Make an address inactive). Inactive shows only those, All shows both. Only the last two put a chip beside the search box, and removing that chip puts the list back on Active.
- Only without images: no map picture yet.
- Only with invite: a subcontractor has been invited and not answered, the rows that show Awaiting confirmation from ....
- Only without route: not on any route you can see.
- Only without subcontractor: nobody assigned or invited, the rows marked Missing business.
- With rules: only addresses that carry at least one service rule, which is the quickest way to see where the exceptions live (see Add a service rule). Such an address also wears a small Rules chip in the price column of the list, on the addresses you own; an address handed to you shows no chip, because rules are the owner's. Hover the chip to read the rules without opening the address.
Press Apply filters. The active filters appear as chips beside the search box; the cross on a chip removes that one, and Reset all in the popover removes them all. Cancel closes the popover without changing anything. The list cannot be sorted; it is always newest change first.
Location groups
A group is a label for a set of addresses: a housing association's estates, the north side of town, a contract. An address can be in one group at a time.
-
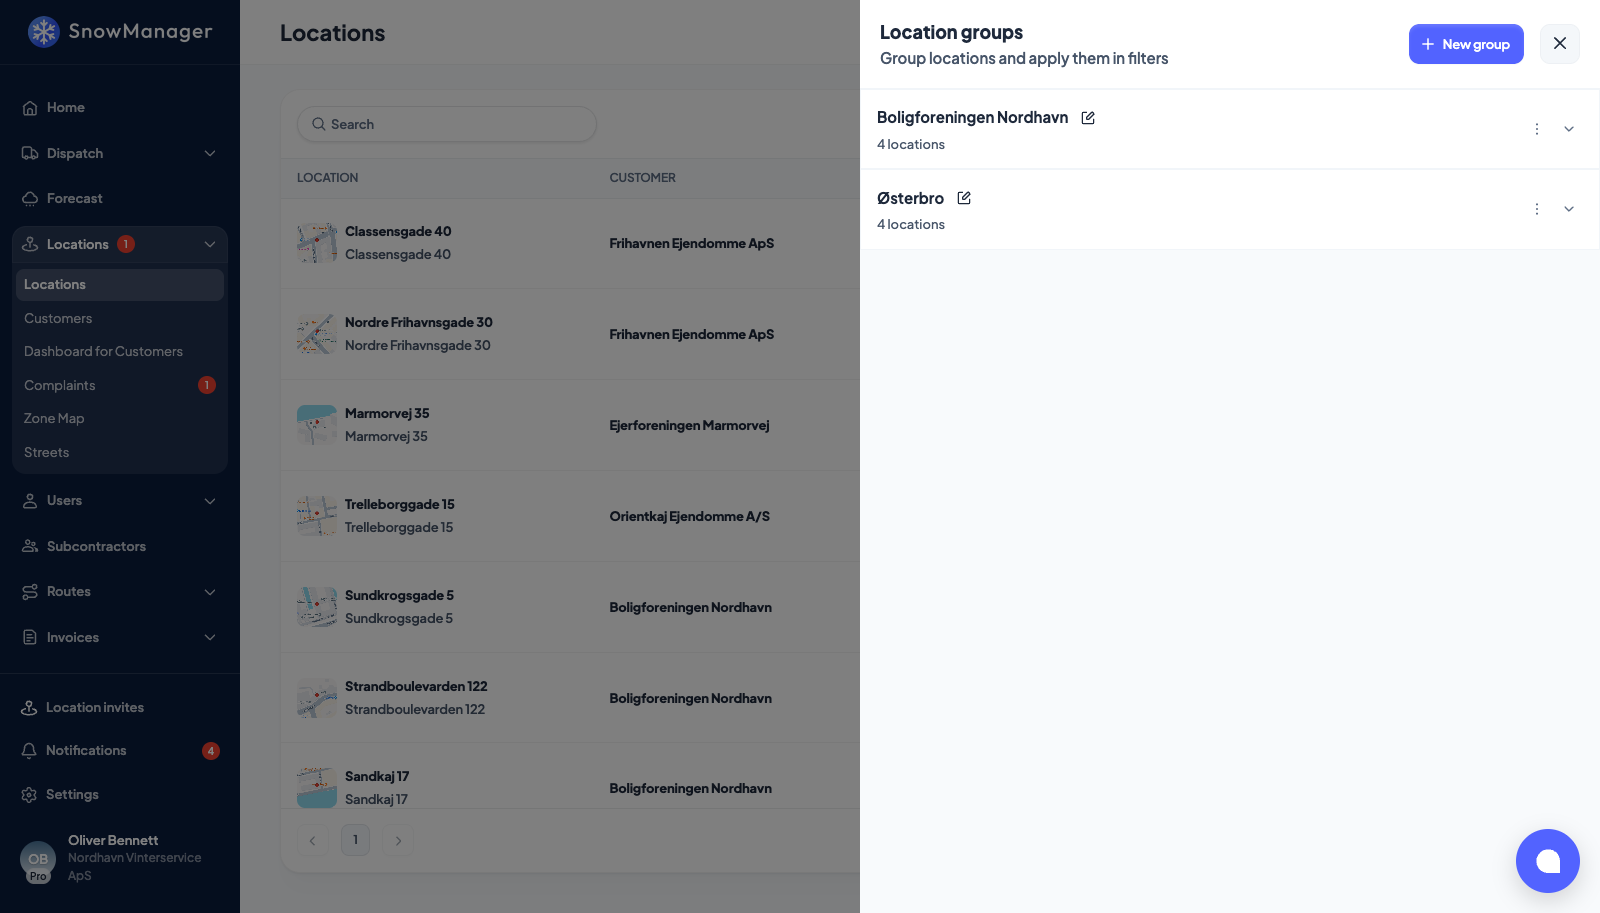
Press Manage location groups. The Location groups panel lists your groups with the number of active addresses in each, the same way the Locations tile on Home counts.
-
Press New group, give it a Group name, optionally an ID, and tick addresses under Included locations; only addresses not yet in a group are offered. The search box above the list finds an address the same way the list search does, customer name and number included, and Load more fetches the next addresses. Ticks survive a new search, so you can search for one customer, tick, and search for the next. Select all ticks every address the popup is currently listing, and turns into Deselect all to clear them again. Press Create.
-
Later, the three dots on a group give Add locations (the same search, Load more and Select all) and Delete group, the pencil gives Rename group (the name and the ID), and the chevron opens the group so you can take an address out with Remove from group. The group's count of addresses follows at once when you add or remove some.
The ID is the group's identifier in your accounting system, and it is optional. Today one thing reads it: with Dynamics NAV connected, an invoice is booked on the department whose ID the invoice's addresses' group carries, and an invoice covering addresses in groups with different IDs is refused until it is split. See Connect e-conomic, Dinero, QuickBooks or Dynamics NAV.
Deleting a group only ungroups its addresses: This will ungroup all included addresses.
Where groups are used
- Group in the Filters popover and in Export parameters.
- Groups on Home and on Reports: the figures there can be narrowed to one or more groups, and the choice is remembered for you across both pages. No group sits at the bottom of that list with its own count, so the addresses nobody filed can be read on their own or added to the groups beside them. See the Home dashboard and the profit and loss report.
- The invoice exports ask for a Locations group too.